How to Crochet a Mini Amigurumi Chick – Perfect for Easter Baskets!
- Emi
- Apr 5
- 4 min read
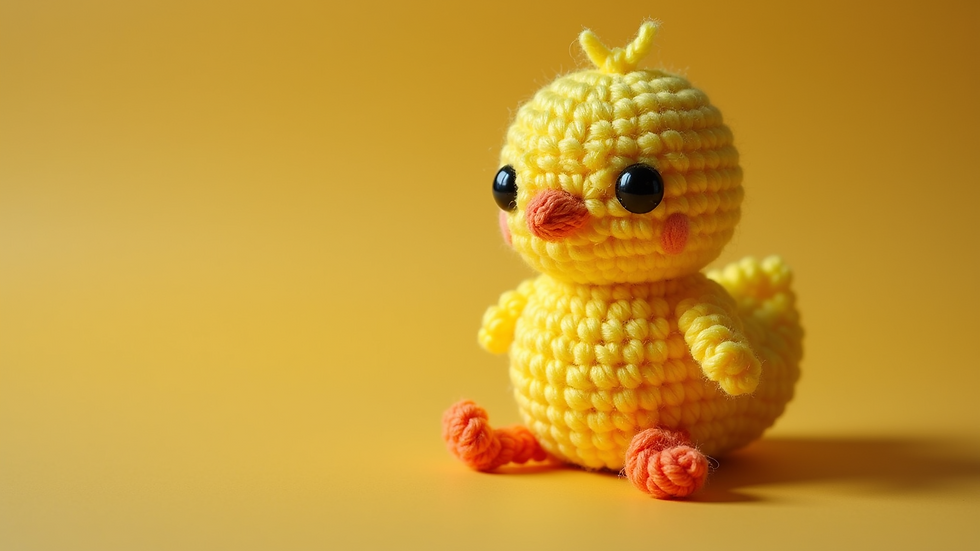
Easter is just around the corner! Why not celebrate the holiday by making your own mini amigurumi chick? This cute little chick is an enjoyable and straightforward project for both beginners and experienced crocheters alike. Plus, it makes a lovely addition to any Easter basket. In this guide, we'll walk you through the steps to crochet your very own mini amigurumi chick, complete with practical tips and detailed instructions.
Materials Needed
Before diving into this fun project, gather all the materials you'll need. Here’s a handy list to set you on your way:
Yarn: Opt for a bright yellow yarn for the chick's body. Acrylic or cotton yarn is ideal. You will also need some orange yarn for the beak and feet.
Crochet Hook: A 3.5 mm (E/4) or 4 mm (G/6) crochet hook is perfect for amigurumi projects.
Stuffing: Polyester fiberfill is a great choice for giving your chick its shape. A small 16-ounce bag usually provides enough stuffing for multiple projects.
Safety Eyes: Use 6 mm safety eyes, or you can stitch eyes with black yarn for a classic look.
Stitch Marker: This tool is handy for tracking your rounds.
Scissors: Necessary for cutting your yarn and trimming any long ends.
Yarn Needle: Ideal for weaving in ends and attaching pieces.
Gathering these materials sets you up for a smooth crocheting experience and ensures that your chick will turn out adorable!
Crochet Pattern Overview
Now that you have your supplies ready, let’s look at the basic structure of the mini amigurumi chick. The chick is made up of several parts: the body, the beak, the feet, and the eyes. Each piece is simple to crochet, making this an excellent pattern for beginners.
To create the chick, you will use the following crochet techniques:
Single Crochet (sc): This is the main stitch used in amigurumi.
Increase (inc): This technique involves crocheting two stitches in one stitch to make the piece wider.
Decrease (dec): This technique helps narrow your work, creating a rounded shape.
Working in rounds is a fun way to practice your skills while crafting something delightful!
Step-by-Step Instructions
1. Crocheting the Chick’s Body
Round 1: Begin with a magic ring and chain 1. Crochet 6 sc into the magic ring. Pull the ring tight to close.
Round 2: Increase each sc around (12 sc).
Round 3: 1 sc, inc around (18 sc).
Round 4: 2 sc, inc around (24 sc).
Rounds 5-8: Crochet 24 sc in each round.
Round 9: 2 sc, dec around (18 sc).
Round 10: 1 sc, dec around (12 sc).
Round 11: Dec around (6 sc). Now, stuff your cute chick with the stuffing material.
Round 12: Slip stitch to secure and fasten off, leaving a long tail for sewing.
2. Making the Beak
Round 1: Using orange yarn, start with a magic ring and chain 1. Crochet 4 sc into the magic ring.
Round 2: Inc all around (8 sc).
Round 3: Sc around (8 sc).
Fasten off, leaving a long tail for attaching the beak to the chick.
3. Creating the Feet
Round 1: Using orange yarn, create a magic ring and chain 1. Crochet 3 sc into the magic ring.
Round 2: Inc all around (6 sc).
Fasten off, leaving a long tail. Make two feet in total.
4. Adding Safety Eyes
If you're using safety eyes, attach them to the chick's body between rounds 5 and 6. If you prefer to embroider the eyes, use black yarn to stitch two small dots for the eyes.
5. Assembling the Chick
This part is really enjoyable! Use the yarn needle to sew the beak onto the front of the chick’s head. Position the safety eyes above the beak and attach the feet to the bottom of the chick's body.
6. Finishing Touches
After assembling all parts, do a final check on the eyes and any accessories you want to add. You might want to create a cute bow or a tiny hat using leftover yarn or fabric scraps. This adds extra charm to your delightful chick!
Now your mini amigurumi chick is complete and ready to light up anyone's Easter basket!
Tips for Success
Tension Matters: Keep your stitches consistent in tension to avoid gaps, which ensures your chick looks neat and cute.
Practice Makes Perfect: If you are new to crocheting, don't stress about making each stitch perfect. Consistent practice will improve your skills.
Color Variations: While the traditional chick is yellow, feel free to experiment with different colors. Pastel pink or blue chicks can be wonderful surprises!
Use a Stitch Marker: This simple tool helps you keep track of your place in the pattern.
Join a Community: Consider joining an online crochet group for support. Sharing your progress and learning from others can enhance your crocheting journey!
Easter Basket Presentation
Once you've finished crocheting your mini amigurumi chick, consider how to make it even more special! Place your lovely creation in an Easter basket filled with bright plastic eggs, chocolate treats, and some decorative grass. Creating a few more chicks in varying colors adds to the fun!
Get creative! Pair your chick with a mini crochet bunny or some knitted carrots to create an entire Easter scene.

Wrapping Up
Crocheting a mini amigurumi chick is a delightful project that adds joy and creativity to your Easter celebrations. It’s a perfect activity for beginners and a relaxing way for experienced crafters to unwind.
With just a few simple materials and steps, you’ve created something that can be cherished for years to come. Don’t forget to share your creations with friends and family, or gift them as part of an Easter basket!
Happy crocheting, and may your Easter be filled with fun, love, and creativity!
Comments